
Google Compute Engine (GCE) is a component of Google Cloud Platform (GCP), which enables users to launch virtual machines (VMs) on demand. As per the project requirements, VMs can support the use of SSD and GPUs. In this article, I will summarize how to setup a GCE VM for solving data science related problems.
NB: this document is for my future reference.
Steps
The process involves the following steps:
- Creating a virtual instance
- Install basic packages
- Create an image for future VMs
- Set up Google Bucket
- Adding SSD disks to the instance
- Migrating files and folders from Google Storage to SSD disk
- GPU Set up
- Set up Jupyter Lab
Creating a virtual instance
Before you begin, you will need to have:
- A Gmail account linked with Google Cloud Platform (GCP)
- Enable billing for the GCP account with debit/credit card
- Upon logging into GCP, navigate to Google Compute Engine (GCE) > VM instances
Click on create instance. For the current project, I selected the following options to create the VM instance
- Name: dyslexia-untied
- Region: asia-southeast1 (Singaopre) Zone: asia-southeast1-b
- Machine type: 4 vCPU
- Memory (RAM): 16 GB
- GPUs: NVIDIA Tesla P4
- OS images: Ubuntu 16.04 LTS
- Boot disk type: Standard persistent disk (50 GB)
- Identity and API access: Check “Allow full access to all Cloud APIs”
- Check “Allow HTTP traffic” and “Allow HTTPS traffic”
These settings are illustrated in the following image:

NOTE: Once you have created the VM, and set it running, you can open up a terminal by pressing SSH button.
Install basic packages
Anaconda
Anaconda is a free and open-source distribution of python and R programming languages for data science, and machine learning applications.
Create a downloads directory, and switch into it.
mkdir downloads
cd downloads
Download and install the latest Anaconda build for linux:
wget http://repo.continuum.io/archive/Anaconda3-2018.12-Linux-x86_64.sh
bash Anaconda3-2018.12-Linux-x86_64.sh
Follow the on screen instructions. The defaults should work fine, but make sure you answer yes to the last question about prepending the install location to PATH:
Do you wish the installer to prepend the Anaconda3 install location to PATH
in your /home/[username]/.bashrc? [yes|no][no] >>> yes
To make use of Anaconda, reboot VM and connect to it
sudo reboot
Install unzip and pv
You are very likely to download zip archives to your VMs, so get the unzip utility installed:
sudo apt-get install unzip
For extracting big tar files with progress bar use pv. Go to the root directory and install pv
cd ~
sudo apt-get install pv
Extract tar files using pv e.g.
pv mobile_image.tar.gz `| tar xzf -
Delete tar files to free up space
rm mobile_image.tar.gz

gcsfuse
Add the gcsfuse distribution URL as a package source and import its public key:
export GCSFUSE_REPO=gcsfuse-`lsb_release -c -s`

echo "deb http://packages.cloud.google.com/apt $GCSFUSE_REPO main"| sudo tee
/etc/apt/sources.list.d/gcsfuse.list

curl https://packages.cloud.google.com/apt/doc/apt-key.gpg | sudo apt-key add -
Update the list of packages available and install gcsfuse
sudo apt-get update
sudo apt-get install gcsfuse
Create an image for future VMs
You now create a disk image of the VM you have built, you can create a new VM instance with all this software pre-installed.
First of all, stop your VM using the VM instance console.
Now go to Compute Engine > Images, and select CREATE IMAGE. From the dropdown menu, select source disk as the VM on which you have installed Anaconda, unzip etc.

- Navigate again to the Compute Engine — VM instances page, select ‘Create Instance’, press ‘Change’ on the Boot disk panel, and select ‘Custom Images’. You should see the disk image you just created available for you as a boot disk. If you now create a new VM from this image, it will have all the software (and conda virtual env) you just installed already installed and ready to use.
Set up Google Bucket
Creating a storage bucket is straightforward. Take the Google Cloud Storage Quickstart tutorial to walk you through it.
I have created a bucket called rbiswasfc as follows:

Remember to choose the same geographic location as VM instance for smooth data transfer.
Adding Persistent Disks (SSD)
Navigate to your GCE VM instance details and click on edit. In the additional disk section, click on add new disk. Subsequently, fill up the details in the pop up window as per your needs, e.g.
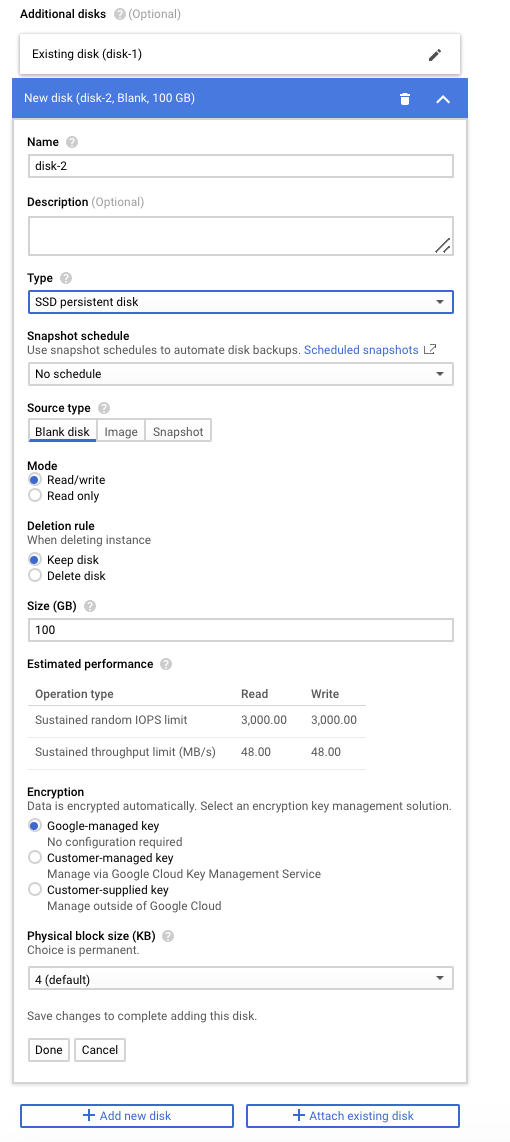
Mount the disk by executing the following sequence:
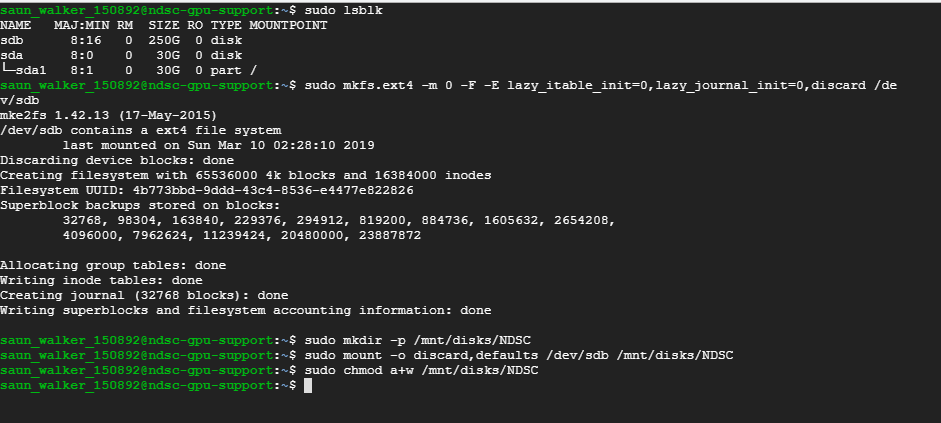
List the disks that are attached to the instance and find the disk that you want to format and mount. Run the following command
sudo lsblk

Format the content of sdb
sudo mkfs.ext4 -m 0 -F -E lazy_itable_init=0,lazy_journal_init=0,discard /dev/sdb

Make directory for mounting the disk. Here I am creating /mnt/disks/NDSC for storing my documents
sudo mkdir -p /mnt/disks/NDSC
Mount the disk
sudo mount -o discard,defaults /dev/sdb /mnt/disks/NDSC
Give reading and writing permissions
sudo chmod a+w /mnt/disks/NDSC
To automate mounting the SSD disk upon restarting the VM, execute the following:
Create a backup of your current /etc/fstab file
sudo cp /etc/fstab /etc/fstab.backup
Use the blkid command to find the UUID for the zonal persistent disk.
sudo blkid /dev/sdb
Open the /etc/fstab file in a text editor and create an entry that includes the UUID. Make sure to use your correct disk name inplace of ‘NDSC’
echo UUID=`sudo blkid -s UUID -o value /dev/sdb` /mnt/disks/NDSC ext4
discard,defaults,nofail 0 2 | sudo tee -a /etc/fstab
Use the cat command to verify that your /etc/fstab entries are correct:
cat /etc/fstab
Transfering files from Google bucket to Persistent SSD
Now I need to transfer the project data from Google Bucket: rbiswas to my SSD
- First go the mounted directory
cd /mnt/disks/NDSC
- Copy and paste
gsutil cp gs://rbiswasfc/raja/*

GPU Set up
The basic steps to set up GPU are as follows:
Apply for GPU quota. May take 1-2 days to get approved.
- To apply for quota, go to IAM & admin > Quotas and select the options as shown below:

Make sure you have GPU limit set to at least 1 else choose the limit from “EDIT QUOTAS”. After resolving the GPU limit, open up a VM with GPU.
Install CUDA (drivers for GPU) by executing the following commands:
- Download the CUDA Toolkit
curl -O http://developer.download.nvidia.com/compute/cuda/repos/ ubuntu1604/x86_64/cuda-repo-ubuntu1604_10.0.130-1_amd64.deb- Use
dpkgcommand to add the repository to your system
sudo dpkg -i cuda-repo-ubuntu1604_10.0.130-1_amd64.deb- Use the
apt-keycommand to authenticate the download
sudo apt-key adv --fetch-keys http://developer.download.nvidia.com/compute/cuda/repos/ubuntu1604/x86_64/7fa2af80.pub- Update the package lists:
sudo apt-get update- Install CUDA
sudo apt-get install cuda-10-0- Enable persistence mode
sudo nvidia-smi -pm 1- The following commands should setup the environment variables and add them to run command (rc) script file. Next, remember to source the rc file so that we can use them straightaway.
echo 'export CUDA_HOME=/usr/local/cuda' >> ~/.bashrc echo 'export PATH=$PATH:$CUDA_HOME/bin' >> ~/.bashrc echo 'export LD_LIBRARY_PATH=$LD_LIBRARY_PATH:$CUDA_HOME/lib64' >> ~/.bashrc source ~/.bashrc- Reboot
sudo reboot- Verify its all working properly and GPU is recognized
nvidia-smi
Install cuDNN
To download the installation files, please proceed to https://developer.nvidia.com/cudnn to register for an account.
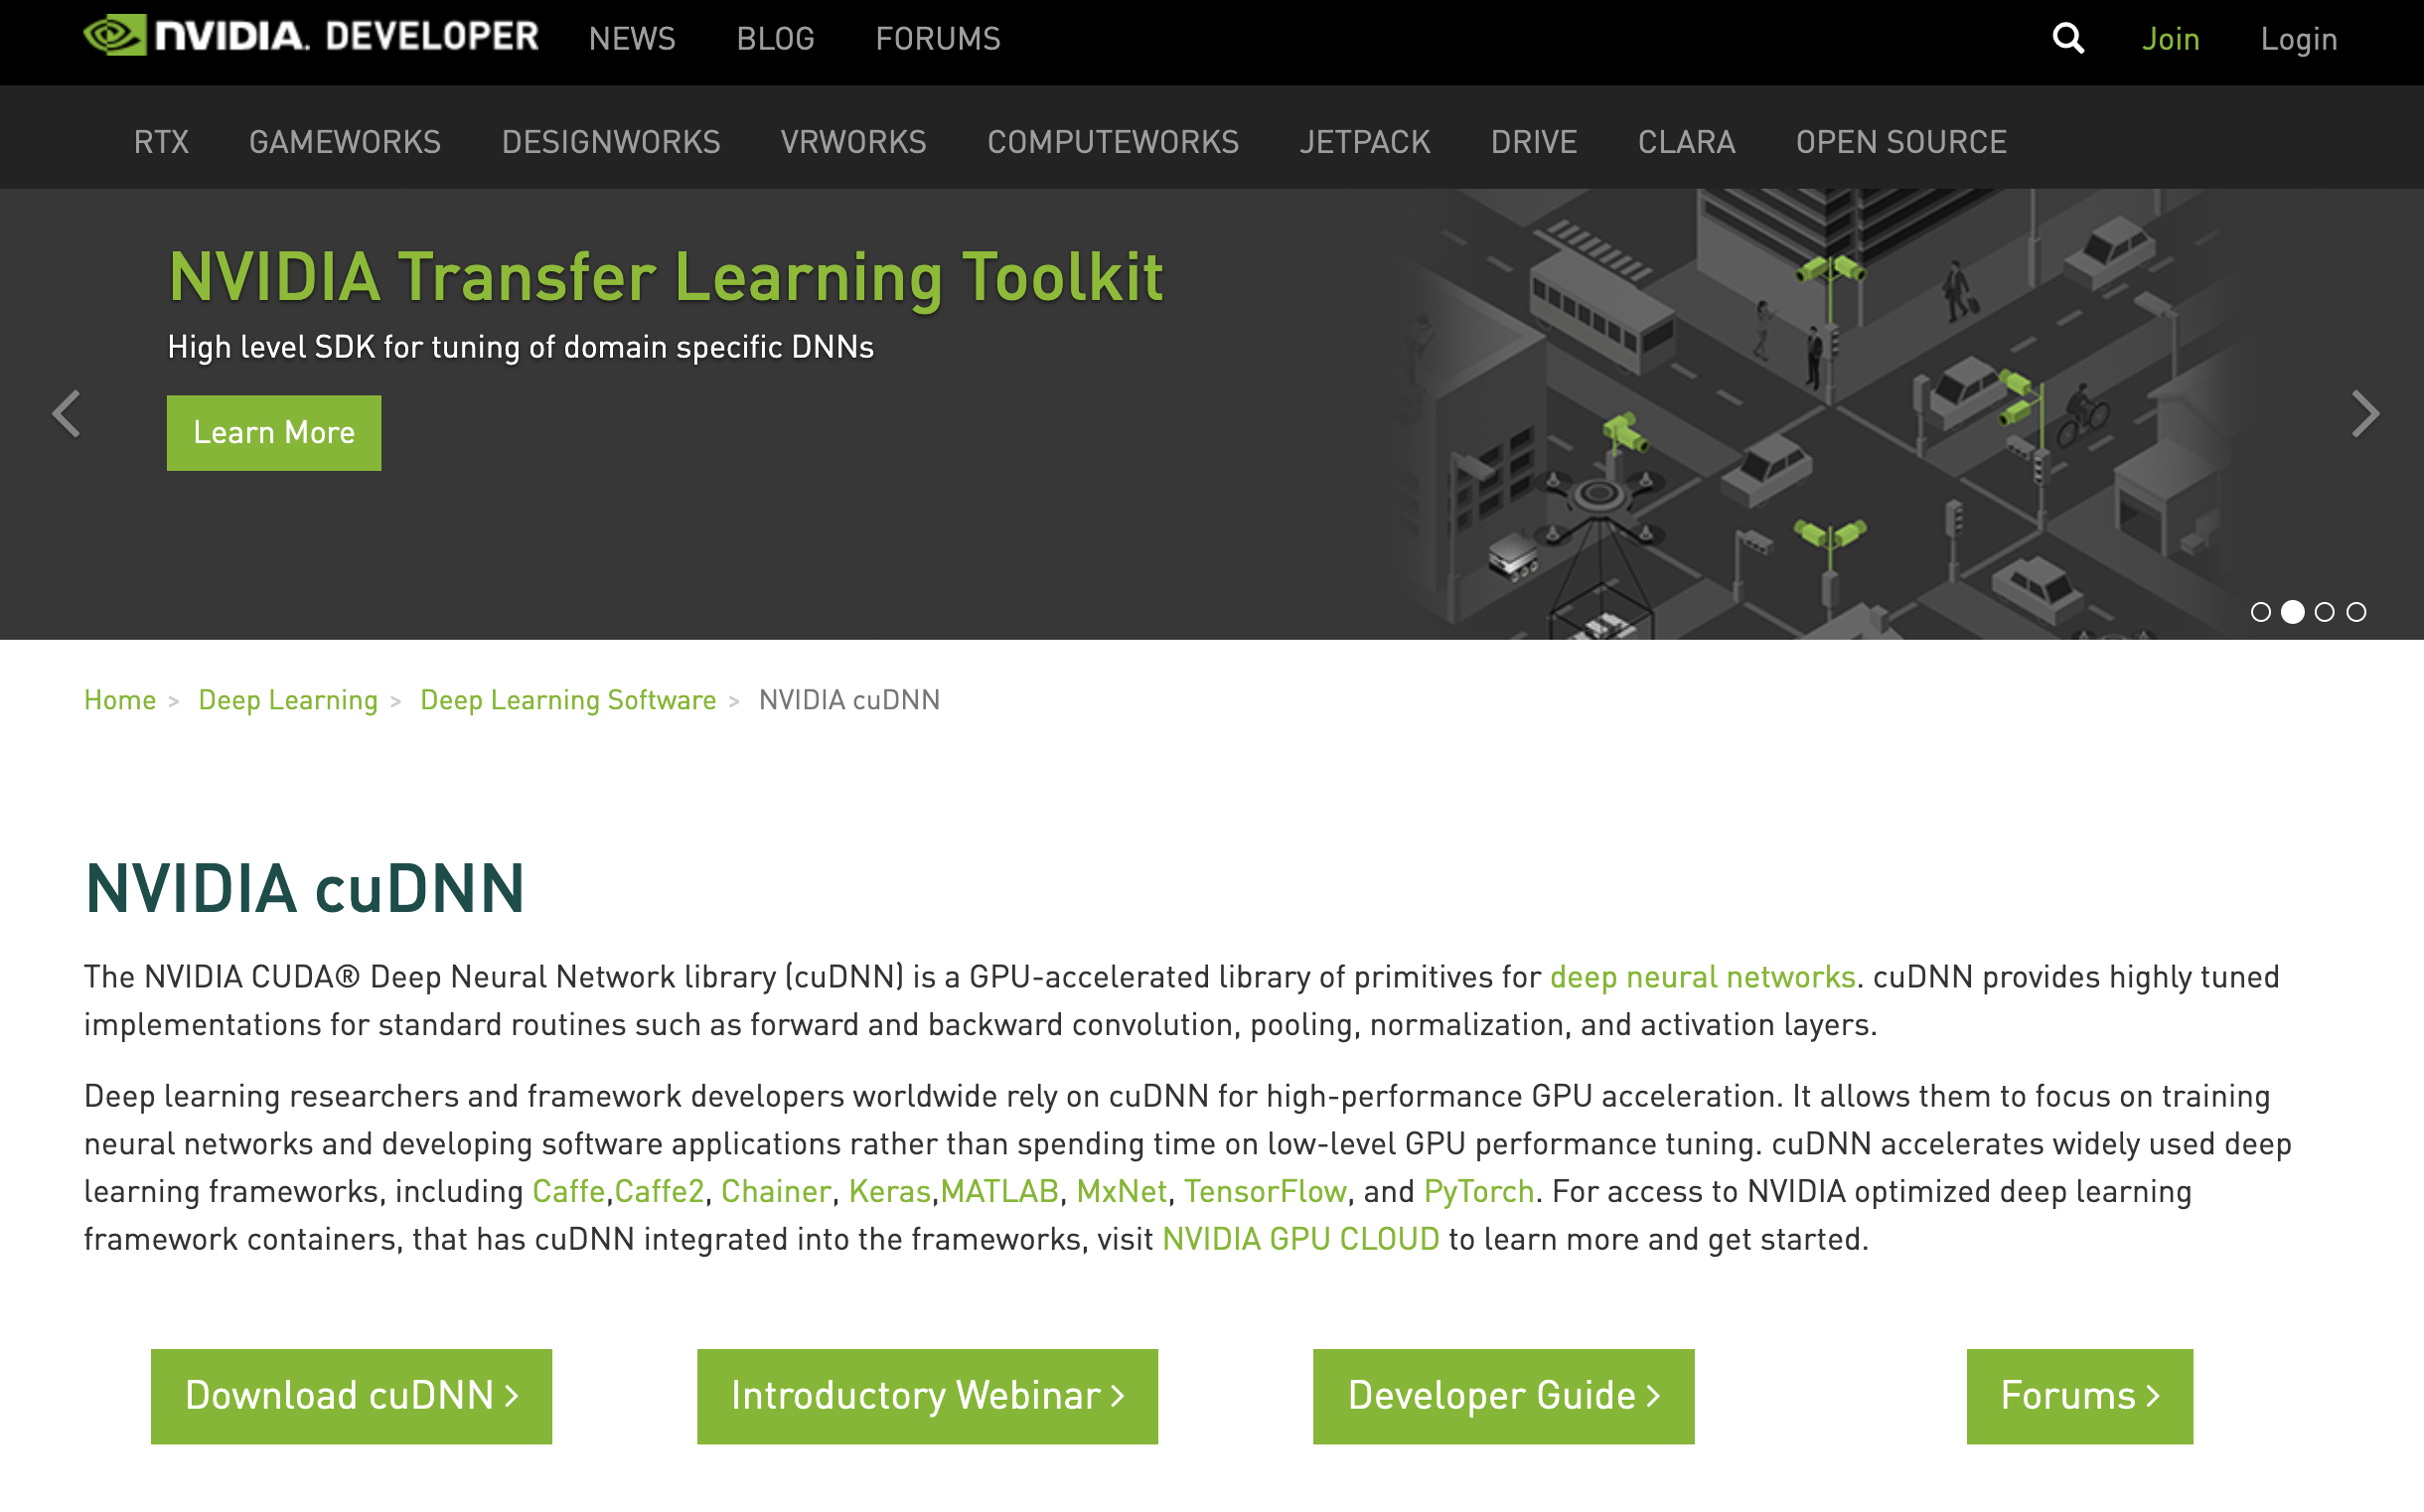
Once your account has been created and verified, proceed to download the cuDNN library which is compatible with installed CUDA version.
Download the cuDNN library from https://developer.nvidia.com/rdp/cudnn-download.
In my case, I downloaded cuDNN v7.5.0 (Feb 25, 2019), for CUDA 10.1. Upload the installation file in your Google bucket.
Copy the installation file from Google bucket to VM
cd ~

gsutil cp gs://rbiswas/* .
Please replace rbiswas with your bucket name.
Once the file has been uploaded to GCP instance, unpack and move the files as root.
tar xzvf cudnn-8.0-linux-x64-v6.0.tgz

sudo cp cuda/lib64/* /usr/local/cuda/lib64/

sudo cp cuda/include/cudnn.h /usr/local/cuda/include/
Install tensorflow-gpu
conda create --name tf_gpu tensorflow-gpu

source activate tf_gpu
To make tf_gpu kernal available in jupyter lab, install the following
conda install jupyter

conda install nb_conda

conda install ipykernel

python -m ipykernel install --user --name tf_gpu --display-name "Python (tf_gpu)"
Install other python libraries as need arises using pip (after activating tf_gpu using source activate). For example, to install keras execute
source activate tf_gpu

pip install keras
Set up Jupyter Lab
- From your desired directory, execute
jupyter lab --ip=0.0.0.0 --port=8888 --no-browser &
Copy the generated token
Now, go to your browser and type xx.xxx.xxx.xxx:8888 (replace x with your external IP of your VM). You will need the generated token to authenticate jupyter lab.